Table of Contents
Understanding IPTV and Its Appeal
Ever felt stuck watching TV on someone else’s schedule? With IPTV (Internet Protocol Television), you’re in control. Think of it like streaming Netflix—but for live TV. Instead of bulky cable boxes or fuzzy satellite dishes, IPTV uses your internet connection to deliver shows, sports, and movies straight to your Windows device.
Why does this matter? Well, imagine skipping commercials and replaying last night’s game whenever you want. No more racing home to catch a show or paying for channels you never watch. IPTV cuts the cord on old-school TV hassles.
But here’s the kicker: Flexibility isn’t its only perk. IPTV often costs less than traditional cable, and the quality? Crisp HD streams, even for live events. It’s like having a personalized TV station that adapts to your life.
“With IPTV, you’re not just watching television; you’re enhancing your entertainment experience.”
Step-by-Step Guide to Setting Up IPTV on Windows
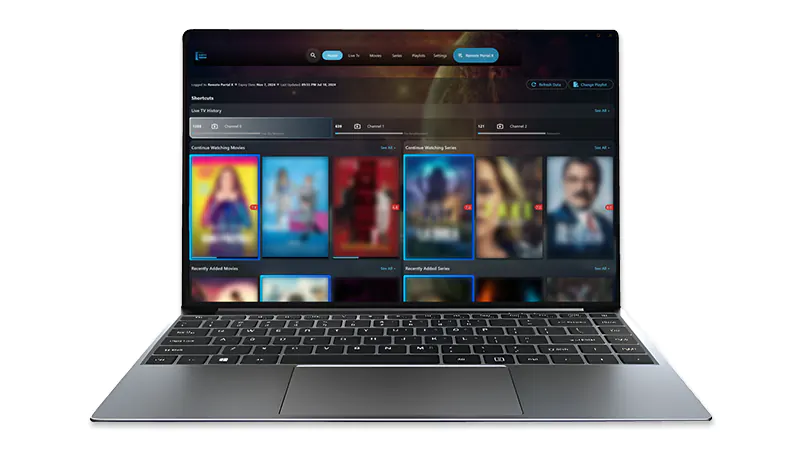
It’s time to turn your Windows PC into a TV powerhouse! You’re just a few clicks away from ditching cable clutter and unlocking better faster entertainment. Think of it like setting up a personal Netflix—but with live sports, live events, and live channels, with your favorite shows all in one spot. Also, if you’re not tech-savvy, don’t sweat it. We’ll walk you through two popular apps (TiviMate and IPTV Smarters Pro) so you can pick the one that feels right. If you follow it, you could be streaming the latest blockbuster while your old cable box is nowhere to be seen.
Installation Process for TiviMate and IPTV Smarters Pro
Let’s start with the two main free options:
- TiviMate IPTV Player
- IPTV Smarters Pro
Should you encounter any persistent difficulties, don’t hesitate to reach out via email or WhatsApp for further assistance. Enjoy your seamless IPTV streaming experience!

Option 01: IPTV Smarters Pro
IPTV Smarters Pro is simpler than setting up a coffee maker. Seriously—if you can stream Netflix, you’ve got this.
Step 1: Download IPTV Smarters Pro
First things first: Get the app. Open your browser (Chrome, Firefox, or even Edge) and head to the official IPTV Smarters Pro website. Stick to the source.
Pro tip: If your browser throws a security warning, don’t panic. Just double-check the URL. Or proceed with the URL. As this is a false positive.
Step 2: Save the File
Now, Chose Your “Downloads” folder if asked where to download the file, most of the times it will be downloaded in the “Downloads” but if you’re the “I-need-everything-on-my-desktop” type, go for it.
Step 3: Install IPTV Smarters Pro
Found the .exe file which you just downloaded? Double-click it and let the installer load. You’ll breeze through options like “Agree to terms” and “Choose install location.” No need to overthink—default settings are your friend here. As it will not require more space in your storage, you can leave it on default option.
Step 4: Launch The App & Log In
Find the IPTV Smarters icon Click it. The app’s clean interface will greet you. Now, for the playlist and login setup:
Server URL: Copy-paste this carefully. HTTP://, not HTTPS://. One typo, and it’s like trying to unlock a door with a banana. Although some URL will have HTTPS:// as well make sure to check for any typos.
First Box: Name your setup. You can choose any for the playlist here which you like.
Username/Password: Check your email or Where you received them from the IPTV provider.
Step 5: Start Streaming!
Hit “Login,” and—you’re in! Explore channels, replay last night’s game, binge a cheesy soap opera or your favorite series. Lost? And if you ever lost or need help, Shoot us a message. We provide support to our customers whenever they need it.

Option 02: TvMate IPTV Player
For those who prefer another route, installing the TiviMate IPTV Player via Microsoft Store could be an attractive option for seamless streaming and a personalized experience tailored to your viewing habits:
Download TvMate IPTV Player (Microsoft Store)
Search ‘TviMate IPTV Player‘ in the Start menu of Windows or lunch Microsoft store and search there and click on it, then select ‘Get or Install’—this is done by just two simple steps!
The app will be ready for use shortly after installation completes and your start menu icon should appear. You can open this directly from there if you prefer a quick start-up route to watching your favorite IPTV content.
Once installed, you’ll see the TvMate IPTV Player icon on your desktop or in the Start menu, ready for you to launch!
Enter Your Login Information
Upon launching the application, logging into TiviMate is straightforward:
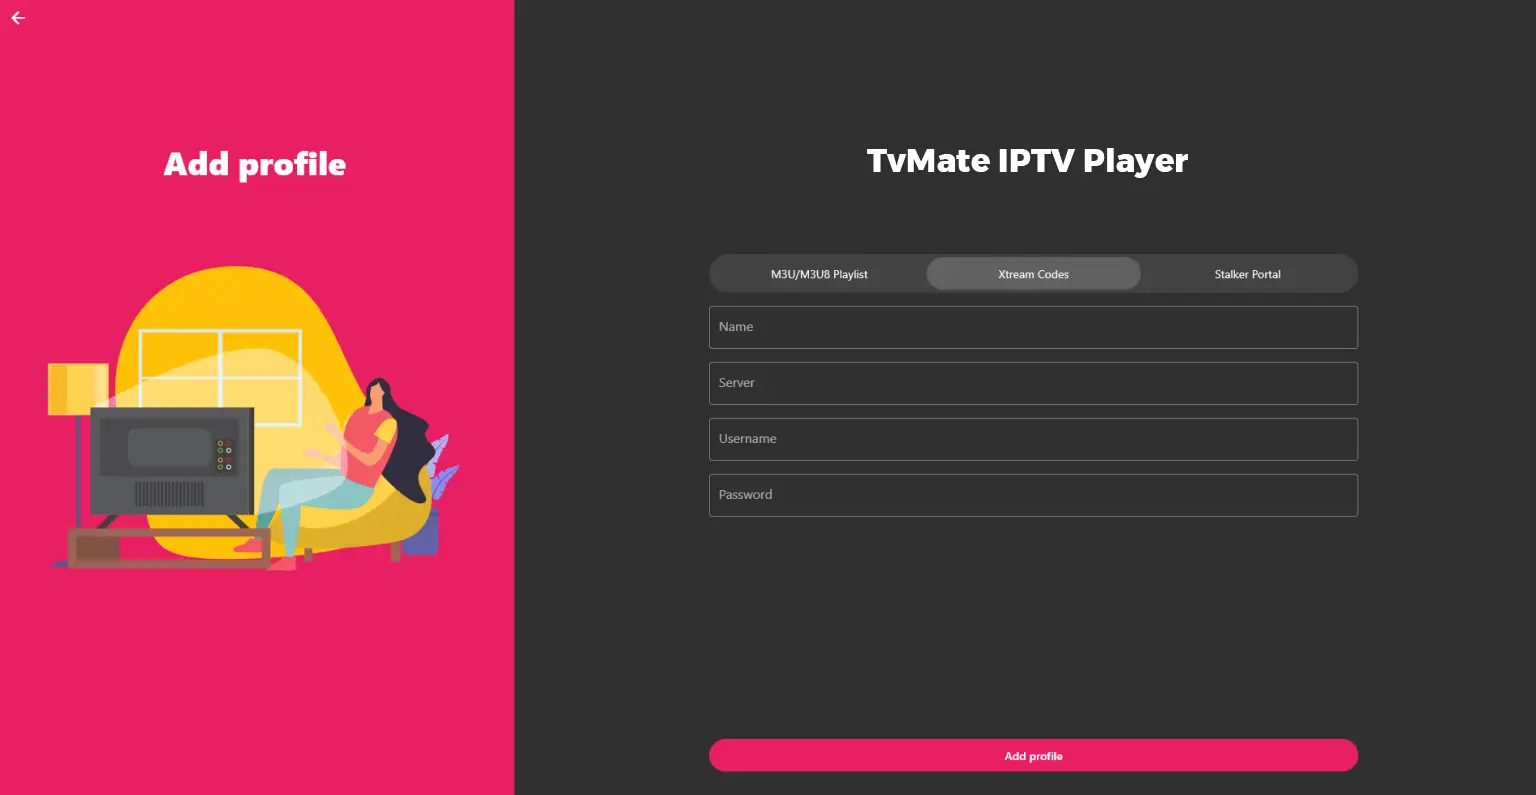
look for an option that says ‘Log in’, inputting Xtream Codes API or M3U Playlist URL as per your provider’s instructions will grant you access to a vast selection of IPTV channels.
Make sure to double check the login details from your service provider. So you don’t have any issue logging in.
- You have two options for logging in:
- Xtream Codes API
- M3U Playlist URL
- Please select your preferred method and enter the required credentials:
- If using Xtream Codes API: Input your username, password, and the server URL.
- If using an M3U playlist: Simply paste your playlist URL in the required field.
- After entering your details, click Login to proceed.
Both TiviMate and IPTV Smarters Pro offer robust solutions for setting up and enjoying content on Windows devices with their respective unique features tailored to enhancing user experience. Whether you’re a casual viewer or someone needing multiple profiles (playlists), these applications cater to varied needs ensuring everyone can enjoy the rich world of IPTV without any unnecessary complexity.

Option 03: IPEXO IPTV Player (Paid)
For those seeking an all-in-one solution, with constant updates, consider the paid option of downloading and installing the IPEXO IPTV Player for Windows device users looking to enjoy a broader array of features at their fingertips.
Download IPEXO IPTV Player for Windows
- Access the Official Website – Open your preferred web browser, and navigate directly to downloads at ipexo on their official website. Selecting a trusted source is essential for ensuring you’re getting an authentic version of IPEXO IPTV Player without any unwanted software:
- Download the Application
Once on their site, find and click directly on the download link provided – usually a ‘Get or Download Now’ button for Windows users; this should take only about 5 minutes to complete from start to finish using an internet connection with minimum bandwidth requirements met. Save it in your chosen location like the ‘Downloads’ folder for simplicity.
Install Ipexo IPTV Player
Locate the downloaded file, right-click and select ‘Run’ or double-click if you prefer a direct approach – this will launch an installer wizard that guides you through each step to complete installation with clear instructions at every stage: ensure all terms are read and agreed upon before proceeding. This should not take more than 4 minutes in total, setting the foundation for your IPEXO IPTV Player experience on Windows.
Log In
Upon successful setup completion, launch the application from either the ‘Start’ menu or directly via the desktop shortcut icon—logging into IPEXO will grant access to a diverse range of content and features designed specifically for Windows users who desire an integrated streaming solution that caters well beyond basic needs. Remember, your subscription may have terms on its usage after 24 hours; ensure you review these before proceeding further with the application.
Troubleshooting Common Setup Issues
Setting up IPTV can sometimes come with its own set of challenges. Here are a few common issues and their solutions:
- Connection Errors: If your app fails to connect, verify that your internet connection is stable. Disconnecting and reconnecting to your Wi-Fi can resolve many issues.
- Invalid Credentials: Double-check your username and password. Typos can easily lead to login failures, so ensure you copy them accurately from your email.
- Playback Problems: If you experience buffering or playback issues, it might be due to a slow internet connection. Consider upgrading your bandwidth or switching to a wired connection for more stability.
You can also explore our complete guide on IPTV Troubleshooting.
Exploring the Features of IPTV Applications
IPEXO IPTV Player stands out for its sleek interface and extensive feature set that enhances user experience significantly: it includes but is not limited to, multi-language support, a vast library of on-demand content across various genres from around the globe which is provided when you add the playlist, advanced streaming quality control settings like FHD streams with 4K resolution options in select markets, an intuitive search function for easier discovery and accessibility with master search option, plus unique features such as live TV guide integration. With these capabilities at your disposal:
Login Details Breakdown:
- Username/Password pairing is based on the premium subscription you’ve paid—typically provided immediately upon purchase via email or phone communication with IPEXO, ensuring a smooth start to your streaming journey. To avoid any login issues in future sessions, make sure all information matches exactly as received from their communications for uninterrupted access. If you have received the email from them make sure to save it.
Enhanced Viewing Experience:
- Multiple Device Compatibility – The application can be used on various Windows devices and versions (desktop/laptop and tablets), ensuring that your viewership remains consistent across all platforms you use daily or occasionally, with a single account for convenience.
- Customizable Interface & Experience: IPEXO allows users to customize the layout, themes, as well as channel categories—tailoring their interface according to personal preferences and enhancing overall satisfaction through an engaging user experience that feels curated specifically for you.
By opting into a premium service like IPEXO on Windows devices, users gain not only access but also the ability to enjoy high-quality content with features designed to elevate their streaming and viewing pleasure significantly above standard applications in terms of functionality and user experience customization options.
Your Personal Preference on Which App to Choose
Choosing between TiviMate and IPTV Smarters Pro often depends on personal preference and how you plan on making the most of it. TiviMate might resonate more with you If you’re a viewer who likes sleek interface. Its focus on user experience is often a deal-breaker for many users.
However, if you’re someone who requires the ability to manage multiple users or needs details about upcoming programming, IPTV Smarters Pro would likely be the better option. The ability to easily switch profiles and enjoy personalized lists makes it a favorite among families or shared users.
Exploring the Features of IPTV Applications
Ensure compatibility across Windows computers, tablets, smartphones and even Apple TV. When it comes to customizing your viewing experience, you have total creative liberty over, layouts, channels categories.
- Multiple Playlist Support: Let’s talk about importing content with M3U playlists—a feature that simplifies the process of bringing your favorite shows into IPEXO and TvMate. It’s akin to handpicking apples from an orchard (your own personal collection) onto a basket, ready for you without picking them one by one!
- Catch-Up TV: This feature lets you watch content you missed during its live broadcast. TiviMate’s catch-up feature makes it easy to stay updated with your favorite shows.
- HD Quality & Beyond: For those who appreciate their viewing experience in high-fidelity clarity, get FHD & 4K streams that are sharp and detailed.
On the other hand, IPTV Smarters Pro also has its own set of solid features:
- Multi-User Capability: Each with its preferences and viewing history to ensure that every member gets their ideal watching experience without stepping on each other’s digital footprints!
- EPG Support: EPG support is your ticket into live programming schedules. It’s like having an invisible assistant that whispers, “Here it comes!” no more scanning through endless lists when they could just show the content of today or tomorrow!
- Import Options: You can easily import M3U playlists, which makes setup quick and convenient.
Both applications offer excellent streaming experiences, but the choice largely comes down to what features are most essential for your viewing habits.
Potential Enhancements for a Better Streaming Experience
Regardless of which app you choose, certain enhancements can significantly improve your IPTV experience:
- High-Speed Internet: Investing in a high-speed internet connection can alleviate buffering issues, ensuring smoother streaming.
- Use a VPN: A Virtual Private Network not only enhances privacy but can also help in bypassing regional restrictions, giving you access to a wider range of content.
- Regular Software Updates: Both free apps roll out updates, so make sure you keep your application updated to benefit from new features and security patches.
By keeping these enhancements in mind, you can maximize your enjoyment of IPTV channels and ensure you have a seamless experience whether you go with TiviMate or IPTV Smarters Pro.
Final Thoughts on IPTV Streaming on Windows
Reflecting on your journey to set up IPTV on your Windows device, it’s clear that a seamless setup opens the door to a world of entertainment options. The ease with which you can access an array of channels through applications like IPTV Smarters Pro and TiviMate IPTV Player enhances your viewing experience significantly. You can enjoy your favorite shows, movies, or live sports all from the comfort of your PC, without the cumbersome hassles of traditional cable. It’s a breath of fresh air for entertainment enthusiasts. A survey conducted by Statista indicates that 67% of viewers prefer streaming services due to their flexibility and content variety, highlighting the growing trend of IPTV usage.
Don’t hesitate to ask questions, too. Whether you’re troubleshooting an issue or seeking recommendations for the best content, we can help you with that.
“An active community not only enhances your IPTV experience but can also save you time and effort in solving issues.”
In conclusion, IPTV streaming on Windows can be a good experience for those people who spend a lot of time on their Windows computers/laptops and don’t have time for other


